ACTUAL PRODUCT SCREENS
See the workflows before you start.
This is an annotated screenshot walkthrough, not a recording of a live search or show. These captures come from the existing ItemIQ product assets; your account and current interface may differ.
1. Lost SKU: use a candidate as a starting point
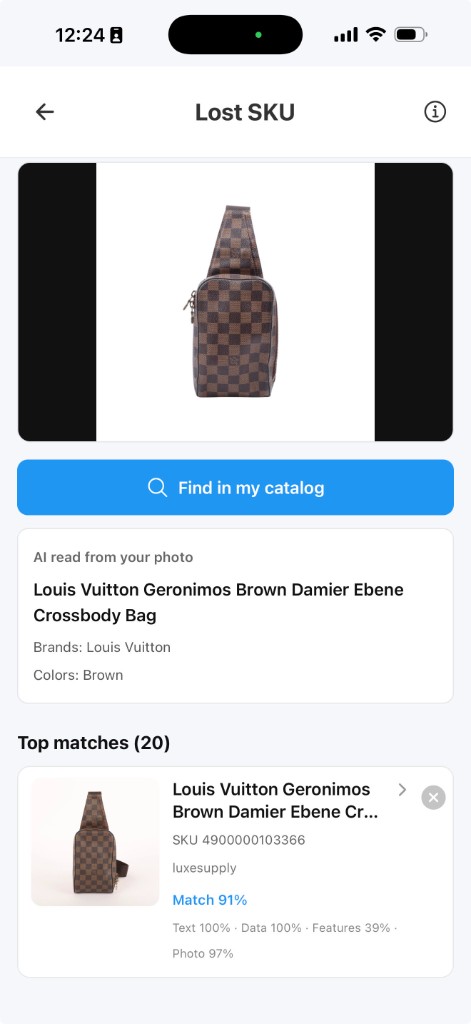
Start with an item whose label is missing. Search using the Lost SKU workflow against your organization catalog, review the returned candidates, and compare the actual item with its record. Check distinguishing details before deciding whether the match is correct. No candidate or an uncertain match means the item stays under review.
Open Lost SKU (sign-in required) · Read the inventory reset guide
2. Host View and Remote Host: rehearse the handoff
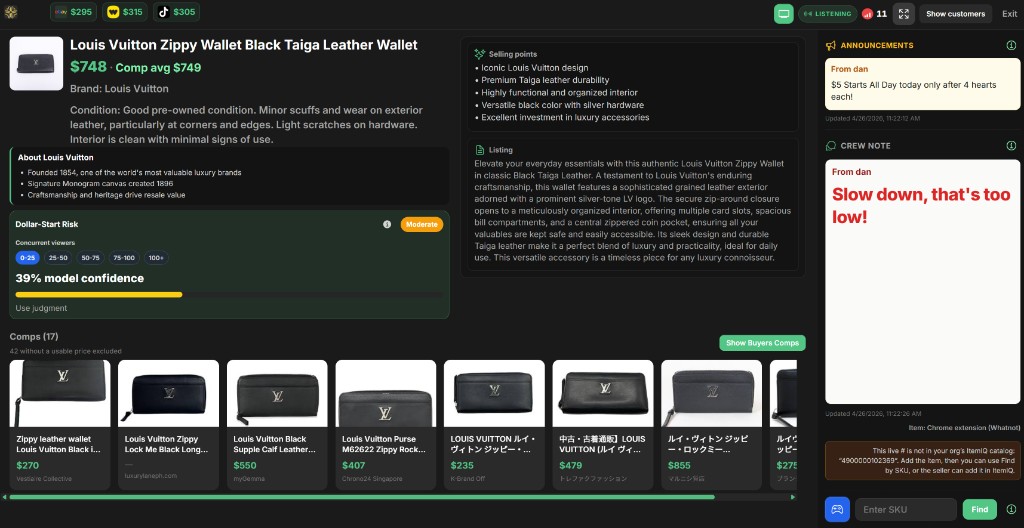
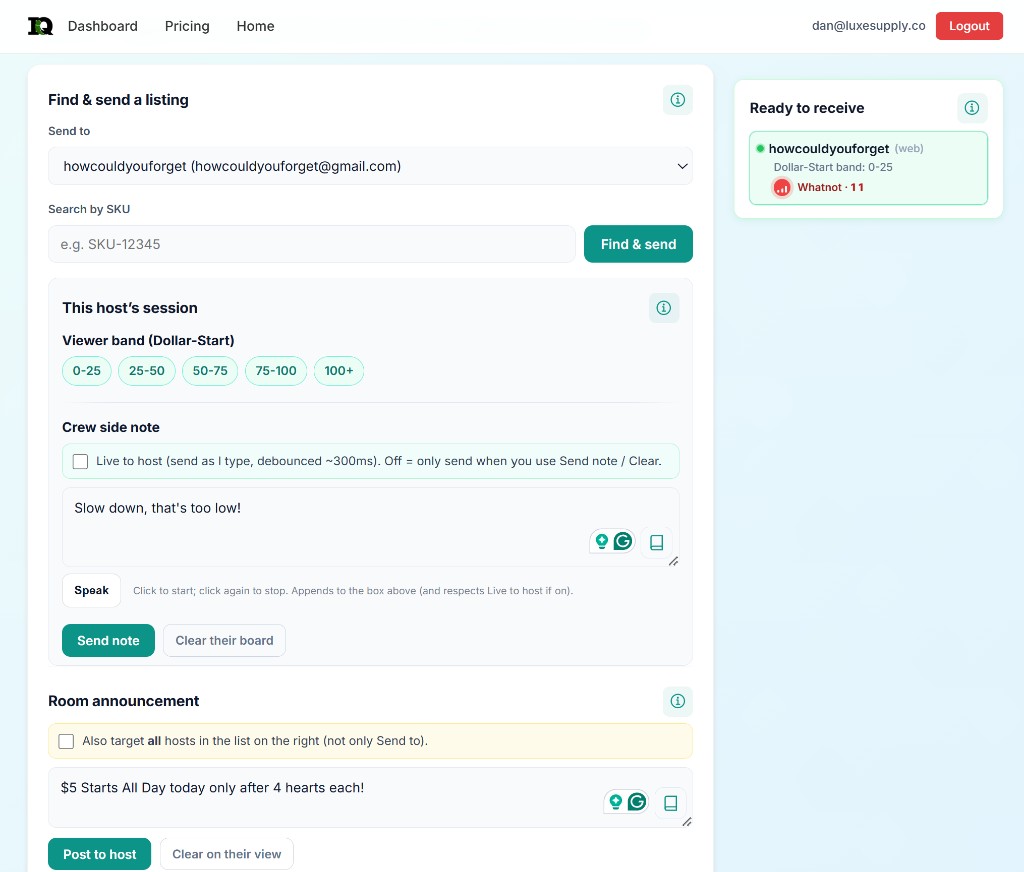
Before a show, confirm the intended room and item. Have the host and teammate practice one SKU handoff and check that the displayed item is the intended one. Setup, roles, and account access matter; confirm the tools in your own workflow before going live.
Open Host View · Open Remote Host · Use the pre-show checklist
3. Keep the same identity through preparation
A stable SKU helps connect the physical label, photos, and record. Start with a small batch and review it before preparing a larger show or export. Work through the three-item example.